.png)


.png)


A 7-Step Expert Guide: How to Make a Wire Rope Sling in 2026
December 31, 2025

Abstract
The fabrication of a wire rope sling is a meticulous engineering process governed by stringent safety standards and material science principles. This document provides a comprehensive examination of the professional methodology for constructing a wire rope sling, specifically focusing on the creation of a Flemish eye splice secured by a swaged sleeve. It details the critical considerations for material selection, including wire rope grade, construction, and appropriate end fittings, which form the foundation of a sling's performance and safety. The procedure is broken down into a sequence of interdependent stages: precise measurement and cutting, methodical eye splicing, the physics and application of the swaging process, and the non-negotiable final steps of proof testing and permanent identification. The analysis emphasizes adherence to standards such as ASME B30.9, which are paramount for ensuring the sling’s integrity and the safety of all lifting operations in industrial, construction, and maritime environments across global markets.
Key Takeaways
- Always select wire rope and components based on the specific load and environmental conditions.
- The Flemish eye splice is a mechanically superior termination method for wire rope slings.
- Proper swaging requires correct die and sleeve selection and a calibrated hydraulic press.
- Understanding how to make a wire rope sling helps in identifying high-quality, safe products.
- Proof testing is a mandatory step to verify the sling's true load-bearing capacity.
- Permanent identification tags are required by law and are essential for safe use and inspection.
- Never use a sling that shows signs of damage or lacks a legible identification tag.
Table of Contents
- The Unseen Strength: Deconstructing the Wire Rope Sling
- Step 1: Foundational Choices: Selecting the Right Wire Rope and Components
- Step 2: Precision in Preparation: Measuring, Cutting, and Marking the Rope
- Step 3: The Heart of the Sling: Forming the Flemish Eye Splice (Turn-Back Eye)
- Step 4: Securing the Splice: The Critical Role of Swaging
- Step 5: Alternative Terminations: An Introduction to Poured Sockets
- Step 6: The Moment of Truth: Proof Testing and Certification
- Step 7: Final Touches: Identification and Preparation for Service
- Frequently Asked Questions (FAQ)
- Conclusion
- References
The Unseen Strength: Deconstructing the Wire Rope Sling
When we witness a massive object—a bridge segment, a wind turbine blade, a shipping container—being lifted into the air, our attention is naturally drawn to the scale of the crane and the size of the load. We marvel at the power on display. Yet, the critical connection point, the flexible sinew of steel that bears the entire burden, often goes unnoticed. This connection is the wire rope sling. To think of it as just a piece of cable is to fundamentally misunderstand its nature. A professionally fabricated wire rope sling is an engineered tool, a product of precision, material science, and an uncompromising commitment to safety. The process of its creation is not one of simple assembly but of careful transformation, where raw wire rope is shaped into a certified lifting device capable of performing its task safely thousands of times.
Why a Properly Made Sling is a Lifeline in Lifting Operations
One might invoke the old adage that a chain is only as strong as its weakest link. In the world of rigging, the termination of a wire rope sling—the eye or loop at its end—is almost always that potential weak link. An improperly formed eye can reduce the strength of the rope by more than 50%, creating a catastrophic failure waiting to happen. This is why the method of fabrication is not merely a technical detail; it is the very essence of the sling's reliability. A well-made sling distributes stress evenly, withstands the rigors of heavy use, and communicates its limits clearly through proper tagging. It embodies a promise of safety from the manufacturer to the end-user. Understanding how these tools are made instills a deeper appreciation for their function and empowers riggers, safety managers, and purchasers to distinguish between a mere commodity and a life-saving piece of equipment. It allows one to look at a lift not just with awe at the power, but with confidence in the integrity of the connection.
A Glimpse into the Fabrication Process: From Raw Cable to Tested Tool
The journey from a spool of raw wire rope to a finished, certified sling is a multi-step process that blends skilled craftsmanship with industrial technology. It begins with a deep understanding of the materials—selecting the precise type of wire rope for the intended application. Then comes the meticulous preparation: the rope must be measured with absolute accuracy and cut cleanly to prevent damage to its structure. The core of the fabrication process is forming the eye, most commonly through a technique called the Flemish eye splice, a robust, interlocking weave that is far stronger than a simple loop. This splice is then permanently secured within a steel sleeve, or ferrule, using a powerful hydraulic press in a process known as swaging. But the work is not yet done. To validate its strength, the sling undergoes a proof test, where it is subjected to a load far greater than its designated working limit. Only after passing this test and being fitted with a permanent identification tag does it become one of the expertly fabricated wire rope slings ready for the demanding world of material handling.
The Governing Principles: Understanding ASME B30.9 and OSHA Regulations
The fabrication and use of wire rope slings are not left to chance or opinion. They are governed by a strict framework of standards and regulations developed over decades of experience and incident analysis. In the United States, the primary documents are the Occupational Safety and Health Administration (OSHA) standards, particularly 29 CFR 1926.251 for construction, and the American Society of Mechanical Engineers (ASME) B30.9 "Slings" standard. These documents provide the blueprint for safety, dictating everything from material specifications and fabrication methods to inspection criteria and removal from service. For instance, OSHA explicitly prohibits using knots to form an eye and sets minimum requirements for the number of tucks in a splice (OSHA, 2022). ASME B30.9 goes further, providing detailed guidance that most reputable manufacturers, including those serving global markets in Europe and the Middle East, adopt as their baseline for quality. Adherence to these standards is not optional; it is the fundamental duty of a responsible manufacturer and the primary assurance of a sling's safety and performance.
Step 1: Foundational Choices: Selecting the Right Wire Rope and Components
Before a single cut is made, the most consequential decisions in the life of a wire rope sling have already taken place. The selection of the wire rope itself and the components that will form its terminations is the bedrock upon which its strength and durability are built. It is a process of matching material properties to the demands of the lifting application, considering factors like load weight, environmental conditions, and the dynamic forces involved in the lift. A choice made without a full understanding of these variables can compromise safety before the sling is ever put into service.
Understanding Wire Rope Anatomy: Core, Strands, and Wires
At its most basic, a wire rope is a complex machine composed of many moving parts. It consists of three primary components: the wires, the strands, and the core. Individual steel wires are twisted together to form a strand. A number of these strands are then helically laid around a central core, which serves as the foundation for the strands. The core's primary role is to support the strands, maintaining their relative position under load and preventing the rope from crushing.
The core is arguably the most critical choice in this initial stage. It typically comes in two main varieties:
- Fiber Core (FC): This core is made from natural fibers like sisal or synthetic materials like polypropylene. Fiber cores are more flexible and are often used in applications where the rope must bend over smaller sheaves. However, they are susceptible to crushing, offer less strength than a steel core, and are vulnerable to heat and chemical damage.
- Independent Wire Rope Core (IWRC): This is essentially a smaller wire rope inserted as the core for the main rope. An IWRC provides significantly more strength (approximately 7.5% more than a fiber core of the same size) and has a much greater resistance to crushing and heat. For most heavy-duty lifting slings, an IWRC is the standard and preferred choice due to its superior strength and durability, as noted in guidance from safety bodies like OSHA .
The number of wires per strand and strands per rope (e.g., 6×19 or 6×37 classification) determines the rope's balance between fatigue resistance and abrasion resistance. A 6×37 rope has more, smaller wires, making it more flexible and resistant to fatigue from bending, but more susceptible to abrasion. A 6×19 rope has fewer, larger wires, making it more resistant to abrasion but less flexible.
| Feature | Independent Wire Rope Core (IWRC) | Fiber Core (FC) |
|---|---|---|
| Material | A separate, smaller wire rope | Natural (e.g., sisal) or synthetic (e.g., polypropylene) fiber |
| Strength | Higher; adds ~7.5% to the rope's breaking strength | Lower; primarily provides support, not strength |
| Crush Resistance | Excellent; provides firm support to outer strands | Poor to Fair; can be easily crushed under high loads |
| Flexibility | Less flexible than FC | More flexible than IWRC |
| Heat Resistance | Excellent; can withstand higher temperatures | Poor; fibers can burn or melt at relatively low temperatures |
| Common Use | Heavy lifting slings, crane hoist lines, high-load applications | General-purpose ropes, applications requiring high flexibility |
Decoding the Lay: Regular Lay, Lang Lay, and Their Applications
The "lay" of a wire rope refers to the direction in which the wires are twisted to form the strands and the direction the strands are twisted around the core.
- Right Regular Lay (RRL): The wires in the strands are twisted to the left, while the strands are twisted around the core to the right. The wires appear to run parallel to the axis of the rope. This is the most common type of lay for general-purpose ropes and lifting slings. It has good crush resistance and is less prone to untwisting.
- Lang Lay: The wires and strands are twisted in the same direction. This construction increases the exposed surface area of each wire, providing excellent abrasion and fatigue resistance. However, Lang lay ropes are more susceptible to crushing and have a strong tendency to untwist, making them unsuitable for single-part lifting and most common sling applications.
For the vast majority of wire rope slings, Right Regular Lay is the standard choice due to its stability and balanced characteristics.
Material Grade and Strength: EIPS vs. EEIPS
The strength of a wire rope is determined by its grade. The two most common grades used for lifting slings are:
- Extra Improved Plow Steel (EIPS): This was the standard for high-strength wire rope for many years. It offers a high breaking strength and excellent durability.
- Extra Extra Improved Plow Steel (EEIPS): As the name suggests, this grade is approximately 10% stronger than EIPS of the same diameter. This allows for a higher Working Load Limit (WLL) with the same size rope, or the use of a smaller, lighter rope for the same capacity.
When specifying a sling, the choice between EIPS and EEIPS depends on the required strength-to-diameter ratio. For high-capacity lifts where sling weight and size are a concern, EEIPS is often the preferred material. All reputable manufacturers mark their slings with the rated capacities based on the rope grade used (OSHA, 2022).
Choosing the Right End Fittings: Thimbles, Sleeves, and Sockets
The termination hardware is just as important as the rope itself.
- Thimbles: These grooved metal fittings are placed inside the eye of a sling. Their purpose is to protect the rope at the point of contact. Without a thimble, the eye would be forced into a tight, sharp bend when placed over a hook, causing extreme stress on the individual wires and leading to premature failure. Heavy-duty thimbles are essential for sling longevity.
- Sleeves (Ferrules): These are the metal sleeves that are swaged (pressed) over the ends of the splice to secure it. They are typically made of carbon steel, stainless steel, or aluminum. Carbon steel is the most common for general industrial slings due to its strength and cost-effectiveness. The sleeve must be sized precisely for the rope diameter.
- Sockets: These are high-strength fittings attached to the end of a rope, usually with molten zinc (spelter) or resin (epoxy). Sockets offer the highest possible termination efficiency (100% of the rope's breaking strength) and are used in critical applications like bridge suspension cables and some heavy-lift crane hoists.
The selection of each of these components must be done in concert, ensuring that the rope, thimble, and sleeve are all compatible and rated appropriately for the intended load.
Step 2: Precision in Preparation: Measuring, Cutting, and Marking the Rope
With the components selected, the physical fabrication begins. This stage is one of precision and care. Unlike woodworking or other crafts where one can easily correct a mistake, an error in cutting or preparing a wire rope is often irreversible, resulting in wasted material and compromised safety. The principles of "measure twice, cut once" are elevated to a critical safety mandate. Every action taken in this preparatory phase directly impacts the geometry and integrity of the final splice.
The Golden Rule of Measurement: Calculating the Cut Length
The first step is to determine the exact length of wire rope needed for a single sling. This is not as simple as cutting a piece of rope to the desired finished length. The formation of the eyes, particularly a Flemish eye splice, "consumes" a certain amount of rope. This is known as the "take-up." The take-up length is dependent on the rope's diameter and the size of the eye being formed.
The formula is straightforward: Cut Length = Finished Sling Length + (Take-up Length per Eye × 2)
Reputable manufacturers have standardized take-up charts based on extensive testing and experience. For example, a 1-inch diameter wire rope might require 30 inches of take-up for each standard Flemish eye. Therefore, to make a 10-foot (120-inch) sling, the calculation would be: Cut Length = 120 inches + (30 inches × 2) = 180 inches (or 15 feet)
Using a calibrated steel tape measure, this length is marked precisely on the wire rope. An error of even an inch can result in a sling that is out of specification, potentially causing issues with load balance in multi-leg bridle assemblies.
The Art of the Clean Cut: Tools and Techniques
Cutting a wire rope is not like cutting a solid bar. Its stranded structure makes it prone to deforming and fraying if not cut correctly. A frayed or crushed end makes the subsequent splicing process nearly impossible and can damage the internal structure of the rope near the cut.
The preferred method in a professional fabrication facility is to use a hydraulic shear or a high-speed abrasive cutting wheel.
- Hydraulic Shears: These powerful tools provide a quick, clean cut by shearing the rope between two hardened steel blades. They are efficient for high-volume production.
- Abrasive Wheels: Abrasive cut-off saws produce an excellent finish. The high speed and abrasive material cut through the wires cleanly and can even slightly fuse the ends, which helps prevent fraying. This method requires proper ventilation and personal protective equipment (PPE) due to the sparks and dust generated.
For any cutting method, the rope should be securely clamped on both sides of the cut line to prevent it from twisting or deforming during the cut.
Seizing the Ends: Why This Non-Negotiable Step Prevents Disaster
Immediately after cutting, and sometimes even before, the rope ends must be "seized." Seizing is the process of tightly wrapping a small-diameter wire (annealed iron seizing wire is common) around the main wire rope to hold all the strands and wires in their original structural position.
Why is this so critical? Without a proper seizing, the helical tension within the rope will cause the strands to unravel from the core the moment the cut is completed. This not only creates a messy, frayed end but also disturbs the "rope lay," the precise arrangement of the strands. This disturbance can extend several inches or even feet down the rope, creating an internal imbalance that is impossible to see but which compromises the rope's strength.
A proper seizing should be tight, neat, and have a length at least equal to the diameter of the wire rope. For larger ropes, multiple seizings are often applied. This simple, low-cost step is one of the most important in ensuring the quality and integrity of the entire fabrication process.
Marking for the Splice: The Blueprint for a Perfect Eye
Once the rope is cut to the correct length and the ends are seized, it must be marked to guide the formation of the eye splice. Using the manufacturer's standard take-up length (e.g., 30 inches for a 1-inch rope), a clear mark is made on the rope from the end. This mark indicates the point up to which the strands will be unlaid. A second mark is often made to indicate the base of the eye, where the thimble will sit.
These marks can be made with a durable paint marker or chalk. Accuracy here is vital. A misplaced mark leads to an incorrectly sized eye or an improperly formed splice, both of which are grounds for rejecting the sling during final inspection. This marking process creates the blueprint for the intricate work of splicing that follows.
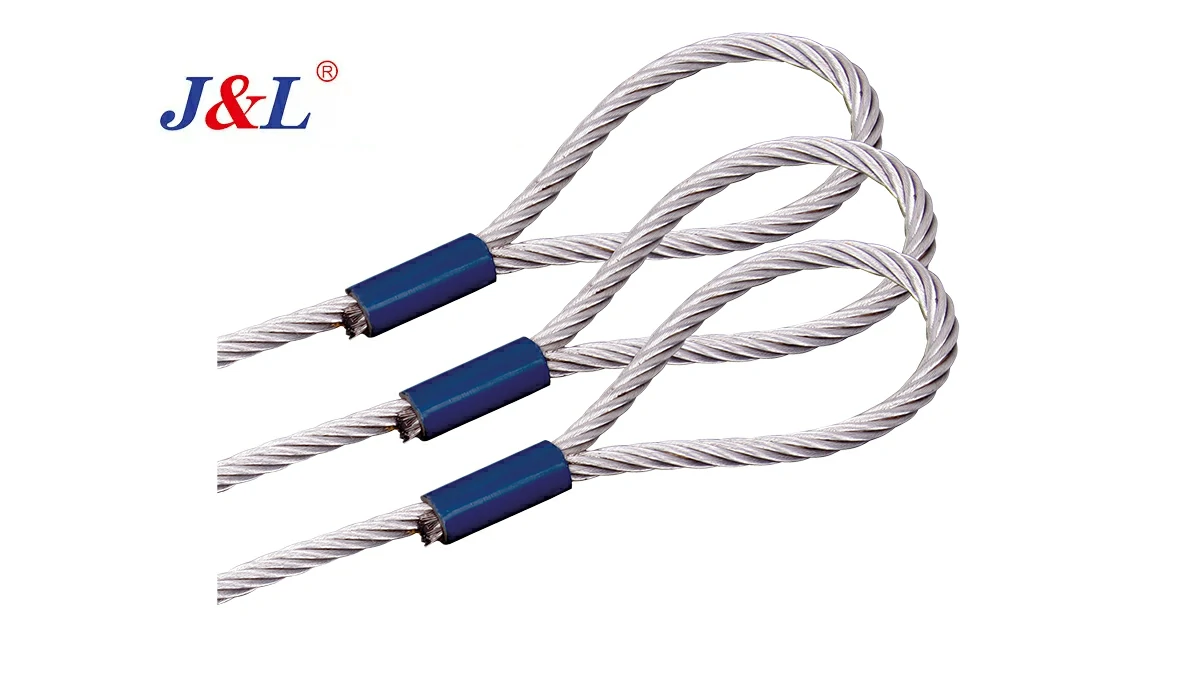
Step 3: The Heart of the Sling: Forming the Flemish Eye Splice (Turn-Back Eye)
We now arrive at the most intricate and skillful part of the fabrication process: the creation of the Flemish eye splice. This is where craftsmanship and mechanical principles intertwine. The Flemish eye is not merely a loop; it is a carefully constructed, interlocking termination that maintains a very high percentage of the original rope's strength. Its design is ingeniously simple in concept yet demanding in execution. It is widely considered superior to older methods like hand-tucked splices for use with swaged sleeves.
The Theory Behind the Flemish Eye: A Superior Mechanical Connection
Imagine a standard 6-strand wire rope. To form a Flemish eye, the rope is unlaid into two groups of three strands each—three continuous strands and their three corresponding strands from the other side. One group is then laid back upon itself to form the eye, and the second group is laid into the voids of the first group, re-forming the rope body in the opposite direction. The result is a mechanical interlock where the two halves of the rope effectively grip each other.
The strength of this splice comes from the fact that it is not purely reliant on friction. As tension is applied to the eye, it pulls the two interlocking halves of the splice tighter together. This mechanical connection is then permanently secured by the swaged sleeve. The combination of the Flemish eye and a properly swaged sleeve can achieve termination efficiencies of 95% or more of the rope's catalog breaking strength, which is significantly higher than what can be achieved with wire rope clips or most hand-tucked splices.
Unlaying the Strands: A Delicate and Methodical Process
The process begins at the end of the properly seized and marked wire rope.
- Remove the Seizing: The temporary seizing wire is carefully removed.
- Separate the Core: The IWRC or fiber core is pulled out from the center of the rope, up to the splice mark made earlier. The core is then cut off and discarded.
- Divide the Strands: The six outer strands are carefully separated into two groups of three. This must be done with care to avoid kinking or bending the individual wires. A common practice is to separate three adjacent strands from the other three. This creates two "legs" of three strands each.
- Straighten Gently: The unlaid strands are gently worked to remove some of the helical shape they retained from the rope body. This makes them easier to manipulate in the next step. A mallet and a flat surface may be used, but excessive force must be avoided.
This unlaying process requires a feel for the rope. A skilled fabricator works with the rope's natural tendencies, not against them, coaxing the strands apart without introducing any damage.
The "Marriage" of Two Halves: Interlocking the Live and Dead Ends
This is the "magic" of the Flemish eye.
- Form the Eye: One of the three-strand "legs" is bent back to form an eye of the desired size. The point where it meets the main body of the rope should align with the second mark made during the preparation phase.
- Interlock the Strands: The second three-strand leg is then carefully woven into the valleys or gaps left in the first leg. The fabricator works from the base of the eye back towards the end of the rope, laying each of the three strands into an empty groove. The goal is to perfectly recreate the original rope structure, but with the strands now running in opposite directions and interlocking.
- Tucking the Tails: The process continues until the ends of all six strands are laid neatly together. The result is a symmetrical, tightly formed splice where the main body of the rope transitions smoothly into the eye.
The finished splice should look and feel like a continuous piece of rope. There should be no significant gaps, crossed strands, or bunching. This step is a testament to the fabricator's skill and attention to detail.
Inserting the Thimble: Protecting the Eye's Integrity
Before the interlocking is fully tightened, the thimble is inserted into the eye. The thimble must be the correct size for the rope diameter. A thimble that is too small will pinch the rope, while one that is too large will be loose and will not provide adequate support. The eye is formed snugly around the thimble's groove. The thimble's purpose is to provide a large, smooth bearing surface, protecting the individual wires from the concentrated pressure and sharp bend that would occur if the eye were placed directly on a hook. It is a critical wear component that dramatically extends the service life of the sling.
Common Pitfalls in Splicing and How to Avoid Them
Even for experienced fabricators, mistakes can happen. Awareness of common pitfalls is key to quality control.
- Incorrect Strand Count: Accidentally splitting the rope 4/2 instead of 3/3 will create an unbalanced and unsafe splice.
- Crossed Strands: During the interlocking process, allowing one strand to cross over another instead of laying in its proper valley creates a high spot and a point of stress concentration.
- Loose Splice: If the strands are not pulled tight and worked together properly, the resulting splice will be loose and will not achieve the desired mechanical lock.
- Kinked Wires: Using too much force or improper tools to unlay or re-lay the strands can cause sharp bends or kinks in the individual wires, creating weak points.
A thorough visual inspection is performed after the splice is formed, checking for these and other defects before proceeding to the next, irreversible step: swaging.
Step 4: Securing the Splice: The Critical Role of Swaging
Once the Flemish eye has been perfectly formed, it must be permanently secured. This is accomplished through swaging. The swaging process takes the meticulously crafted splice and locks it into a solid, unified termination. It is a form of industrial alchemy, transforming a collection of woven strands and a hollow sleeve into a single piece of steel through immense pressure. This step is irreversible and absolutely critical to the sling's final strength.
What is Swaging? Cold Forging Steel for Maximum Security
Swaging is a cold forging process. It is important to understand that it does not involve heat in the way welding does. A hydraulic press is used to exert immense pressure on a set of dies that surround the steel sleeve (ferrule) which has been placed over the splice. This pressure, often hundreds of tons, forces the steel of the sleeve to "flow" into the voids and valleys of the wire rope strands beneath it.
The metal of the sleeve deforms and molds itself intimately around every wire, creating a near-perfect 360-degree grip. This process effectively makes the sleeve and the rope it contains a single, solid unit. The friction and mechanical lock created are so immense that, when done correctly, the rope will break before the splice pulls out of the swaged sleeve. This is the ultimate goal of a secure termination.
Selecting the Correct Sleeve (Ferrule): Material and Size Matter
The sleeve is not just any piece of metal. It is an engineered component designed specifically for this purpose. The selection of the correct sleeve is paramount.
- Sizing: The sleeve must be precisely matched to the diameter of the wire rope. A sleeve that is too large will not receive enough pressure to properly flow and grip the rope, resulting in a weak termination that could slip under load. A sleeve that is too small will not fit over the splice or may damage the rope strands as it is forced on.
- Material: Sleeves are most commonly made from carbon steel, which is suitable for the majority of industrial lifting applications. For marine or chemically corrosive environments, stainless steel sleeves are used. Aluminum sleeves are also available but are generally used for smaller diameter ropes and have different swaging characteristics.
| Sleeve Material | Primary Characteristics | Common Applications |
|---|---|---|
| Carbon Steel | High strength, excellent durability, cost-effective. Typically galvanized for corrosion resistance. | General purpose and heavy industrial lifting slings. The industry standard. |
| Stainless Steel | Superior corrosion resistance, especially in saltwater and chemical environments. More expensive than carbon steel. | Marine and offshore rigging, chemical plants, food processing facilities. |
| Aluminum | Lightweight, good corrosion resistance in some environments. Softer than steel. | Lighter duty applications, architectural rigging, smaller diameter slings. Not for heavy industrial use. |
The Swaging Press: Understanding the Machine
The swaging press is the heart of the operation. These are powerful hydraulic machines capable of generating forces from 50 tons to over 3,000 tons. The press consists of the hydraulic power unit and the press head, which holds the dies.
- Dies: The dies are the hardened steel tools that shape the sleeve. They come in pairs and have a cavity machined into them that matches the desired final "after-swage" diameter of the sleeve. Every rope and sleeve size combination has a specific set of dies. Using the wrong dies is a critical error that guarantees an improper swage.
- Calibration: The press must be regularly calibrated to ensure it is delivering the correct pressure. The swaging process is based on achieving a specific percentage of reduction in the sleeve's diameter. This can only be accomplished with a properly functioning and calibrated machine.
The Swaging Process Step-by-Step: From Placement to Final Press
- Sleeve Placement: The correct sleeve is slid over the wire rope and positioned carefully to cover the entire splice area, right up to the base of the thimble.
- Die Selection and Installation: The correct die set is selected from the inventory and installed securely in the swaging press.
- Positioning in the Press: The sling assembly is placed in the press, with the sleeve centered within the die cavity. The orientation is important; many sleeves require multiple "bites" or presses, and they must be done in the correct sequence and position as specified by the manufacturer.
- The Press: The operator activates the press. The dies close around the sleeve, and the hydraulic pressure builds until the desired compression is achieved. The operator must wear appropriate PPE, including safety glasses and gloves, and keep hands clear of the press area.
- Release and Inspect: The pressure is released, the dies open, and the sling is removed. The swaged section will be warm to the touch due to the intense pressure, but it should not be excessively hot.
Post-Swage Inspection: Verifying a Successful Press
The swaging process is not complete until a thorough inspection is performed.
- Measure the Diameter: The most important check is to measure the diameter of the sleeve after swaging using a pair of calipers. This "after-swage" diameter must fall within a very tight tolerance specified by the sleeve manufacturer (e.g., +/- 0.5 mm). A diameter that is too large indicates insufficient pressure was applied. A diameter that is too small could mean the rope was over-compressed and damaged.
- Check for Flashing: The operator inspects the seam where the two die halves met. A small, thin line of "flashing" (excess metal squeezed out) is normal. However, excessive flashing can indicate over-pressurization or worn-out dies.
- Visual Inspection: The entire surface of the sleeve is checked for any cracks or defects that may have formed during the swaging process. The area where the rope enters the sleeve is also checked to ensure no wires were damaged.
Any sling that fails this post-swage inspection must be immediately scrapped. There is no way to "fix" an improper swage; the entire sling must be remade from scratch.
Step 5: Alternative Terminations: An Introduction to Poured Sockets
While the Flemish eye with a swaged sleeve is the most common termination for wire rope slings, it is not the only method. In certain highly demanding or specialized applications, a poured socket, also known as a spelter socket, is the preferred choice. Understanding this alternative provides a more complete picture of wire rope termination technology. Poured sockets are renowned for achieving the highest possible termination efficiency, effectively rating the connection at 100% of the wire rope's own breaking strength.
When to Choose a Socket over a Swaged Eye
The decision to use a poured socket is driven by the specific demands of the application. They are often specified for:
- Permanent or Semi-Permanent Installations: Such as the main support cables on suspension bridges, guy lines for communication towers, and standing rigging on large structures.
- High-Fatigue Applications: In situations where the termination is subjected to constant vibration or fluctuating loads, the solid, unified nature of a poured socket can offer superior fatigue life compared to a swaged eye.
- Extreme Load/Critical Lifts: For some of the heaviest engineered lifts, the 100% efficiency of a spelter socket provides the highest possible safety margin.
- End-for-Ending: On long crane hoist lines, sockets allow the rope to be detached and "end-for-ended" to distribute wear more evenly over its service life.
The "Brooming" Process: Preparing the Wire for the Socket
The preparation for a poured socket is radically different from that of a splice. The end of the wire rope is prepared to resemble a "broom."
- Seizing: A very tight seizing is applied to the rope at a specific distance from the end, which corresponds to the length of the socket's basket.
- Unlaying Wires: The strands of the rope are unlaid from the end back to the seizing. Then, the individual wires of each strand are unlaid and completely separated from each other.
- Cleaning: This is a crucial step. The "broomed" wires must be meticulously cleaned of all lubricant and dirt. This is typically done with a solvent and wire brushes. The effectiveness of the final bond depends entirely on the cleanliness of the wires. Any residual grease will prevent the pouring medium from adhering properly.
- Positioning the Socket: The cleaned, broomed wires are then inserted into the conical basket of the socket fitting. The wires should be evenly distributed within the basket, and the end of the seizing should be right at the base of the basket. The assembly is then sealed at the bottom with fireclay or putty to prevent the molten pouring medium from leaking out.
The Pouring Medium: Zinc vs. Resin (Epoxy)
Two primary materials are used to fill the socket and anchor the wires:
- Spelter (Zinc): This is the traditional method. High-purity zinc is heated to a molten state (around 800-900°F or 430-480°C) and then poured into the socket basket. As the zinc cools and solidifies, it forms a perfect, cone-shaped wedge that mechanically locks the wires into the conical shape of the socket basket. This method requires specialized heating equipment and strict temperature control.
- Wire-Locking Resin (Epoxy): A more modern alternative involves using a two-part epoxy resin compound. The resin and hardener are mixed and then poured into the socket at ambient temperature. The resin cures over a period of hours, forming a solid, high-strength bond to the wires and the socket basket. Resin pouring avoids the hazards associated with molten metal and is often preferred for field applications.
The Pouring Procedure: A Task Demanding Utmost Care
Whether using zinc or resin, the pouring process must be done correctly.
- For Zinc: The socket must be pre-heated to drive off any moisture and prevent the molten zinc from cooling too quickly. The zinc itself must be at the correct temperature—too cool and it won't flow properly; too hot and it can anneal (soften) the wires, reducing their strength. The pour must be done in a single, continuous motion to avoid voids.
- For Resin: The two parts must be mixed in the exact ratio specified by the manufacturer and for the correct amount of time. The mixture is then poured slowly into the vertically-oriented socket to allow air bubbles to escape.
After pouring, the socket must be allowed to cool or cure for the prescribed amount of time before any load is applied. The process of creating a poured socket termination is a specialized skill that requires specific training and certification. It is a clear example of how critical the fabrication method is to the performance of a rigging component.
Step 6: The Moment of Truth: Proof Testing and Certification
A wire rope sling is not truly complete after the splice is swaged or the socket is poured. While it may look finished, its integrity is still only theoretical. The final, non-negotiable step in the manufacturing process is to subject the sling to a proof test. This is a controlled, destructive test performed on a sample or a non-destructive test performed on every single sling to verify its construction and load-bearing capacity. It is the sling's final exam, and passing it is the only way to certify that it is fit for service.
Why Proof Testing is Non-Negotiable
Proof testing serves several critical functions:
- Validates Fabrication: It is the ultimate quality control check on the fabrication process. A properly made Flemish eye and swage will withstand the proof load. A poorly made one will fail in the test machine, not in the field where lives and property are at risk. It can reveal hidden defects like an improper swage, damaged wire, or a faulty splice that might not be visible to the naked eye.
- Seats the Components: The proof load helps to "set" the components of the sling. It seats the thimble firmly in the eye and causes the strands of the splice to pull tightly into their final, settled position.
- Meets Regulatory Requirements: For many types of slings and applications, proof testing is a mandatory requirement under safety standards. For example, OSHA regulation 1926.251(c)(15)(ii) states that all welded end attachments must be proof tested by the manufacturer at twice their rated capacity. While not all new wire rope slings require a proof test under OSHA, the more stringent ASME B30.9 standard is the benchmark for quality manufacturing, and it requires proof testing for all slings with welded or fabricated fittings. Reputable manufacturers proof test their slings as a standard practice.
The Proof Test Procedure: Applying the Load
The proof test is conducted on a specialized piece of equipment called a horizontal tensile testing machine. These machines are capable of pulling with immense, precisely controlled force.
- Securing the Sling: The sling is laid out in the test bed and its eyes are attached to the machine's anchor points.
- Applying the Load: A hydraulic ram begins to apply a tensile load to the sling, stretching it. The load is increased gradually and smoothly, without any shock loading.
- The Proof Load Value: The standard proof load for a wire rope sling is two times (200%) its designated vertical Working Load Limit (WLL). For example, a sling with a WLL of 5 tons would be proof tested to 10 tons.
- Holding the Load: The sling is held at the full proof load for a specified period, typically a minute or two, to ensure it is stable and shows no signs of slippage or failure.
- Releasing the Load: The load is then gradually released.
Inspecting After the Test: Looking for Signs of Failure
After the load is removed, the sling is subjected to another thorough inspection. The inspector is looking for:
- Sleeve Slippage: Marks are made on the rope at the base of the sleeve before testing. After the test, the inspector checks if these marks have moved, which would indicate the splice has slipped within the sleeve—an automatic cause for rejection.
- Broken Wires: The entire sling body and especially the area around the sleeves are inspected for any newly broken wires that may have occurred during the test.
- Deformation: The fittings, such as the thimble and any hooks, are checked for any signs of stretching, bending, or cracking. The sleeve itself is re-measured to ensure its dimensions have not changed.
A sling that passes this post-test inspection has proven its ability to safely handle its rated capacity with a significant safety margin.
The Certificate of Test: The Sling's Official Birth Certificate
For every sling that is proof tested, the manufacturer generates a Certificate of Test. This document is the sling's official record. It is not just a piece of paper; it is a legal document that certifies the sling's compliance and safety. A proper test certificate will include:
- A unique serial number or identifier that is also on the sling's tag.
- The size, grade, and construction of the wire rope.
- A full description of the sling, including its length and the type of end fittings.
- The designated Working Load Limit (WLL) of the sling.
- The proof load that was applied.
- The date of the test.
- The name and signature of the testing body or manufacturer.
This certificate should be kept on file by the end-user for the life of the sling.
The Importance of Traceability
The unique serial number on the sling and the certificate creates a chain of traceability. This allows a user or inspector to trace a specific sling all the way back to the batch of wire rope it was made from and the specific test it underwent. This traceability is essential for quality control, accident investigation, and managing a safe and compliant rigging locker. It is a hallmark of a professional and responsible manufacturer.
Step 7: Final Touches: Identification and Preparation for Service
After a sling has been expertly fabricated and has successfully passed its proof test, it undergoes the final steps that prepare it for a long and safe service life. These finishing touches are not merely cosmetic; they are critical for communicating the sling's capabilities and limitations to the end-user and for ensuring compliance with international safety standards. This final stage transforms the tested component into a fully functional and compliant piece of lifting gear.
The Identification Tag: The Sling's DNA
Perhaps the most important component attached to the sling at the end of the process is its identification tag. This tag is the sling's voice, providing the rigger with all the essential information needed to use it safely. A missing or illegible tag is one of the primary reasons for a sling to be removed from service during a daily inspection.
Safety standards, such as OSHA 1926.251(c)(16), mandate what information must be included on the tag. A compliant tag for a wire rope sling will display:
- Name or Trademark of the Manufacturer: This establishes accountability.
- Size: The nominal diameter of the wire rope (e.g., 1 inch or 26 mm).
- Number of Legs: For bridle slings (e.g., 2-leg, 4-leg).
- Rated Capacities (Working Load Limit): This is the most critical information. The tag must show the WLL for the sling in the three primary hitch types: vertical, choker, and basket. For multi-leg bridle slings, the capacity is typically given based on a specific sling angle (e.g., 60 degrees).
- Sling Angle: The angle upon which the bridle sling's rating is based.
Many manufacturers also include a unique serial number on the tag, which links back to the proof test certificate and manufacturing records, ensuring full traceability.
Methods of Tagging: Metal Stamps, Engraved Plates
The tag must be durable enough to withstand the harsh environment of a construction site or industrial plant. Paper or plastic labels are insufficient. Reputable manufacturers use robust methods:
- Stamped Metal Tags: Information is stamped into a thick aluminum or stainless steel tag.
- Engraved Plates: Information is machine-engraved for maximum clarity and durability.
The tag is securely attached to the sling, often with its own small wire rope lanyard, in a location where it is easily accessible for inspection but unlikely to be crushed or snagged during a lift.
Final Quality Control Checks
Before a sling is packaged for shipment, it undergoes one last comprehensive quality control inspection. A trained inspector will:
- Verify that the sling's length is within the specified tolerance.
- Confirm that the tag information is correct and matches the sling's specifications.
- Perform a final visual check of the entire sling, looking for any cosmetic defects, sharp edges on the sleeves, or any other anomaly.
- Ensure that the proof test certificate has been generated and is associated with the sling's serial number.
This final check is the manufacturer's last opportunity to ensure that the product leaving their facility meets their own high standards and the expectations of their customers for safety and quality.
Proper Storage and Handling of New Slings
The manufacturer's responsibility extends to ensuring the sling arrives at the customer's site in perfect condition. New slings are often coiled, lubricated, and packaged to protect them from damage and corrosion during transit and storage. End-users should also follow best practices for storing their slings. They should be stored in a clean, dry area off the ground, away from corrosive chemicals, extreme heat, and mechanical damage. Hanging slings on a dedicated rack is the ideal storage method. Proper storage prevents kinking, corrosion, and other damage that can shorten a sling's service life before it even begins. By understanding this complete, 7-step process, users are better equipped to procure, inspect, and safely use the highest quality certified and tested wire rope slings available on the market.
Frequently Asked Questions (FAQ)
Can I make my own wire rope sling on a job site?
While it may seem possible, fabricating your own slings on a job site using methods like wire rope clips is strongly discouraged and often prohibited by safety regulations for lifting purposes. OSHA standard 1926.251(c)(4)(iii) explicitly states that eyes in wire rope bridles or slings shall not be formed by wire rope clips. Wire rope clips are designed for temporary applications and can significantly reduce the rope's strength if not installed perfectly. Professional sling fabrication requires specialized equipment like hydraulic swagers and proof testing machines to ensure safety and compliance with ASME B30.9 standards.
What is the difference between a swaged sleeve and a spelter socket?
A swaged sleeve is a metal ferrule that is cold-pressed onto a mechanical splice (like a Flemish eye) to secure it. This method is very reliable and used for the vast majority of general-purpose lifting slings. A spelter socket is a fitting where the end of the wire rope is "broomed" open inside a conical basket and then secured by pouring in molten zinc or a special epoxy resin. Spelter sockets achieve 100% of the rope's breaking strength and are typically used for more permanent or critical applications like bridge cables or large crane hoist lines.
How often do I need to inspect a wire rope sling?
According to OSHA and ASME standards, inspections are required at two frequencies. First, a "daily" visual inspection must be performed by a competent person before each shift or each day the sling is used. This is a hands-on check for obvious damage. Second, a "periodic" thorough inspection must be conducted by a qualified person at regular intervals. For normal service, this is at least annually, but for severe service, it could be monthly or quarterly. Records of these periodic inspections should be maintained.
What does the "design factor" of a sling mean?
The design factor (sometimes called safety factor) is the ratio between the sling's minimum breaking strength and its Working Load Limit (WLL). For wire rope lifting slings, the industry standard design factor is 5:1. This means a sling with a WLL of 2 tons must have a minimum breaking strength of at least 10 tons. This large safety margin accounts for wear and tear, dynamic loading, and other unforeseen stresses in a lift.
Can a damaged wire rope sling be repaired?
Generally, the wire rope body of a sling cannot be repaired. If the rope is kinked, crushed, or has excessive broken wires, it must be removed from service and discarded. However, according to OSHA guidance, end fittings and attachments can sometimes be repaired or replaced by the manufacturer or a similarly qualified entity. Any repaired sling must be proof tested and re-certified before being put back into service.
What is "bird-caging" and why is it dangerous?
"Bird-caging" is a specific type of wire rope damage where the rope is forced to untwist, causing the outer strands to bulge out and form a cage-like shape. This often happens when a rope is suddenly released from a high load or forced through a restriction. It is extremely dangerous because it indicates that the rope's structure has been severely compromised. The strands and wires are no longer properly balanced to share the load, and the rope's strength is drastically reduced. A sling with any sign of bird-caging must be immediately removed from service.
How does the angle of a lift affect the sling's capacity?
The angle of the lift has a dramatic effect on the tension in each sling leg. When a load is lifted with a multi-leg sling, the lower the angle between the sling legs and the horizontal, the higher the tension on each leg. For example, at a 90-degree angle (a straight vertical lift), each of two legs supports 50% of the load. At a 30-degree angle, the tension on each leg is equal to the full weight of the load, effectively doubling the stress. This is why sling capacity charts always provide ratings based on specific angles, and using slings at angles below 30 degrees is strongly discouraged.
Conclusion
The journey of a wire rope sling from raw material to a load-bearing tool is a testament to the power of disciplined engineering and manufacturing. It is a process where every step—from the initial selection of steel grade to the final stamp on an identification tag—is a deliberate action aimed at ensuring strength, reliability, and above all, safety. To understand how to make a wire rope sling is to appreciate the intricate balance of material science, mechanical force, and human skill. It reveals that the unseen, often unappreciated sling is not a simple accessory but a highly engineered component, the integrity of which underpins the success and safety of every lift. This knowledge empowers users not to fabricate slings themselves, but to become more discerning consumers and safer operators. It fosters an ability to recognize quality, demand compliance, and respect the forces at play. Ultimately, a properly manufactured and certified wire rope sling is more than just a piece of rigging; it is a vital link in the chain of safety that protects personnel, equipment, and property in demanding environments across the globe.
References
Juli Sling Co., Ltd. (2025). Juli Sling Co Ltd | Lifting and rigging products manufacturer. Retrieved from
Juli Sling Co., Ltd. (n.d.). Wire rope sling. Retrieved from https://julislings.com/shaped-strand-wire-rope-copy-product/
Lift-It Manufacturing Co., Inc. (2025). Product and safety information | Slings | Hoists. Retrieved from
Occupational Safety and Health Administration. (2018). Guidance on safe sling use – Introduction. U.S. Department of Labor. Retrieved from
Occupational Safety and Health Administration. (2022). 1926.251 – Rigging equipment for material handling. U.S. Department of Labor. Retrieved from
Occupational Safety and Health Administration. (2022). Guidance on safe sling use – Synthetic web slings. U.S. Department of Labor. Retrieved from
Occupational Safety and Health Administration. (2022). Guidance on safe sling use – Wire rope slings. U.S. Department of Labor. Retrieved from